Officially we’re halfway through our school year and we’ve had a bit of rearranging going on ~ some over the last 8 weeks and a few new pieces added to start this semester. You can see our full 2011-2012 homeschool curriculum list in the post I wrote earlier this past fall. Here’s a look at the areas we made changes.
I do love the fact that we have the flexibility to tweak things in our schedule that are {or are not} working for us so that our family gets the most out of what we are doing. Sometimes it’s a bit frustrating, but when something ‘clicks’ ~ that is just a wonderful feeling!
Our prior program just was causing more frustration and tears than learning, and Easy Grammar has made a world of difference. We are also using Daily Grams to go along with the Easy Grammar and the girls {and I} like the layout of the program. We also now have separate levels for the girls {we are using levels 4 and 5}.
Laurianna wrapped up Teaching Textbooks Level 5 and has now started Teaching Textbooks 6. We’ve also added in Life of Fred: Fractions for her to work on on Tuesdays/Thursday in addition to her TT lesson. She loves the simple format and giggles through many of the questions. :)
Reading
Kaleb has finished up All About Reading Level Pre-1 and is now working through All About Reading Level 1 and we are having much fun. He asks to work on it every day {even days we don’t have school}. You have to love that enthusiasm!
McKenna will also be working on her reading comprehension using Beyond the Code 4.
That’s it on this end. Have you made any recent tweaks or changes to your curriculum?
Visit these great companies!
Betty Luckens ~ educational andfun felt sets for children
We’ve officially been in our new schoolroom for 2 weeks now and it has truly been such a blessing to have everything we need in one spot and organized! While we still have a few things that need to be finished {trim work and securing bookcases to the wall}, we’ve been putting it to good use.
Since our room has some odd wall angles, I measured and re-measured and did a lot of online planning to make sure that pieces I was considering would fit in the room. Almost all of the furnishings are thanks to a day-trip to Ikea and the patience of a wonderful friend who helped talk me into {and out of} a few things. I went with a list in hand, but still managed to forget one thing ~ a Trofast shelving unit that is supposed to hold the bins between the kid’s desks. Oops.
Maybe you all remember the disaster of a space when all the books, supplies and what-nots were moved from their various hiding places all over the house and into their permanent learning spots. Yikes! But, it finally came together. I’m not kidding when I tell you I had blisters thanks to the little Allen wrench and a whole lotta screws.
Pictured above: a big, fat mess
I have to tell you that the color of paint in the room {Benjamin Moore Stem Green} scared me to DEATH when I first saw it on the walls ~ before the furniture was in the room. Thankfully, my hubby and good friend were right when they told me it would all be ok {and talked me out of repainting}.
Ready for a little tour of the new schoolroom? Here’s the view from my end of the room {when you come up the stairs from the garage}. We have a larger table area that all of our chairs fit around when we are working together for some subjects {history, Bible, etc…}.
The table {Ikea Norden} also folds down so we can slide it to the side of the room if we want a little more space. It also has 6 handy drawers where we keep some of our extra supplies like paintbrushes, some art supplies, card games, etc…}.
The view from the other end of the room where you come in through the upstairs {via the girl’s room}.
There are two desks on each side of the room ~ we split the kids up boy/girl on each side. They are SO excited to have their own workspace {and I am so happy to not hear ~ “Move your stuff out of my spot!” ~ just sayin’}. Kaleb and McKenna are on one side of the room. There will eventually be a shelving system in between their two desks {the one that I forgot to pick up on the trip}.
Kaleb’s desk area is something I’m just loving. I know it’s a little more busy, but he has all of his ‘stuff’ around him and is so excited about it!His desk area has posters from his All About Reading program, a place to hang the ABC crafts he completes and a space beside his desk for his workbox system.
The boys’ desks are closest to my end of the room so that they can pull up their chairs to the other side of my desk if we need to work together. I got a swivel chair for myself ~ just because. :)
My desk area holds all of the main text books {all the teacher’s guides, etc….} along with all the fun stuff too {a.k.a. the laminator and all the teacher supplies}. Top shelves are all of the books we’ll need for this year, shelf level with the desk holds the day-to-day things, and lower shelves hold all the ‘we use it at sometime’ stuff. We had to rig the top of the shelving system because of the slant of the walls. Instead of the top that comes with the system we screwed a white shelve to the top to hold it in place {shhhhhh!}. That way it can sit flush against the wall and things won’t fall out the back.
One of my favorite parts of the room is the bookcase setup around the window at the end of the room. I LOVE the little window seat area that we were able to create with the bookcases. This has been one of Laurianna’s favorite places to sit and work during the day. I also love that the bin under the bench pulls out to store the kid’s coloring books and such.
The bins on the bottom shelves of the nearby bookcases hold some of our day-to-day things: calendar supplies, our All About Spelling teacher manuals and cards, and also our science curriculum. The kid’s easel is folded up and between the wall and the bookcase.
The shelves on either side of the window hold all the rest of the ‘stuff’ we use during the year: games, history books, Bibles, early readers, chapter books for the girls, puzzles, and just general fun stuff.
So…that’s it! We’re in and almost settled. My hubby is working on the trim and hopes to have it finished soon!! Most everything is linked to underneath each of the photos, but here’s the short list:
I would love to also see your classrooms too ~ wanna share? The best part of putting our room together was gathering ideas from all over the web! I’ve included a linky below for you all to join in and include a thumbnail image of your room.
Visit these great companies!
All About Learning Press ~ Spelling & reading programs that are easy to teach and easy to learn.
Homeschool Calendar and Morning Board ~ Telling Time
I was re-organizing my calendar board for the new school year and trying to get it just right when I stopped over and visited Michelle’s at Delightful Learning and got an idea for a little something to add to our board.
We have several different clocks in our house ~ from the old-fashioned chiming kind with Roman numerals to digital clocks. Michelle was putting her calendar together and made something similar, and I knew that it would help a few of our kids right now. :)
In the blank area of the printable, I have a mini ‘Judy’ clock {it’s about 4.5” squarish}. I printed the time sheet off onto cardstock, laminated it and then attached the mini clock on with four velcro dots so that we can also take it off the board if we want too. So far it’s been a great addition to our morning board routine.
Here’s a look at our re-arranged calendar board. The numbers below all link to the documents/sites where you can find the printables. The board itself if a large piece of foamboard that you can pick up from either Walmart or Target for around $3.
And you can totally ignore the fact that the kids were playing with the hands on the clock…and I didn’t realize it until I was posting this picture. :) It was correct when we did it this morning!
Since all four of the kids will have different verses for Awana this year, I took the verse cards off the board and we added a few things to pray for: our President and our Compassion child.
4. Skip Counting Charts ~ I have a plastic page protector taped to the board and can slide our skip counting charts into this slot {or another 8 1/2” x 11” sheet}.
7. Today’s Temperature ~ This printable has two thermometers on it where we mark the indoor and the outdoor temperature.
8. Weekly Weather Graph ~ Our weekly weather graph that Kaleb and Zachary both do.
You can also see our our calendar and morning board layout from last year. Be sure to check out these other great resources/ideas for calendar and morning board printables:
When I taught in the school system, Guidecraft was a familiar name to me. My classroom had several products that we ordered out of their catalog, but my homeschool classroom hasn’t.
Until now!!
Trying to keep all of the kids school supplies, books and whatnots in one location and then find room for all of my teaching books and manipulatives was getting a little tricky. We had shelves, drawers and baskets overflowing with all of our school gear…and truthfully it was beginning to drive me a little more than nuts. When things around me are scattered…I am too.
This gorgeous School Library Cart showed up on my doorstep one day from Guidecraft ~ and our UPS guy was nice to bring it inside for me. Trust me, this is one solid piece of furniture! It weighs over 40 pounds, so I opened the box when a friend of mine came over to visit and roped her into helping me put it together.
Overall, it was pretty easy to put together. The assembly instructions for the library cart were easy to follow and all done using pictures. At times, the wheels were a little tricky, but from start to finish we had it put together in about 45 minutes. It is definitely a two person job {ok, maybe one if my hubby would have put it together, but I was too impatient to wait for him to get home!}.
Aside from a screwdriver, we didn’t need any additional materials, but I would highly recommend using a socket wrench to tighten everything…otherwise, you’ll be turning the little wrench that comes in the kit for much longer. Besides, using a socket wrench is fun and makes a lovely little noise that makes you feel handy. :)
Laurianna was the official photographer since my hands were otherwise occupied, but here we are about 45 minutes into our endeavor with a successfully assembled library cart that was ready-to-use!
The library cart fits perfectly into the corner of our dining room and is going to be wonderful to use this year. I’ve organized it so that one side has all of my weekly teaching supplies on it {teacher’s manuals, extra books}.
On the other side each of the kids have space to put their books and extras. Instead of putting shelves on the end, we used some removable 3M hooks to hold the kids pencil cases so they can grab them quickly. The bottom shelf holds our extra manipulatives, our spelling curriculum bin, reading bin and extra school supplies.
I love that it has wheels and we can move it around as needed during our school time. It takes up much less room that what we had previously {hooray!!} and there is still plenty of room to fill it up as we go through our school year ~ and trust me, we’ll use it!
…..THIS GIVEAWAY IS NOW CLOSED…..
Do you want to know the best part?? Guidecraft has offered to giveaway a School Library Cart to one of my readers!! How wonderful is THAT?
Ready to win??
Mandatory first entry: Visit the Guidecraft website and let me know what other product you love! Leave a comment and tell me!
For additional entries {leave a separate comment for each entry}:
~ Send out a tweet about this contest. You can copy/paste the tweet below if you’d like!
@jolantheerb is hosting a giveaway for a library cart from @Guidecraft. Enter to win here: http://bit.ly/9SZ1Tn. Ends 8/3.
~ Will you blog about it if you win? Give yourself an extra entry if you will!
This giveaway is open to US and Canadian residents only. Please be sure to leave a separate comment for each entry. The contest will be open until Tuesday, August 3rd at 8pm EST and a winner will be chosen using Random.org. {GIVEAWAY NOW CLOSED}
This year our oldest three {Zachary ~1st, McKenna ~ 3rd, & Laurianna ~ 4th grade} will be working together and focusing on Early American History. This list focuses on the curriculum that we will be using for our older three {preschool excluded…since I’m still tweaking that!}. Otherwise, this is what we have in place for each subject this coming year along with the how often we’ll be working on that subject each week.
Language ~ First Language Lessons was a great addition to our library last year. I love the scripted lessons and the depth that they cover {making it easier for me!}. Zachary will be working through FLL Year 1 and both girls will be working through First Language Lessons Year 3. Is it wrong to say that I am almost giddy that the girls will be learning how to diagram this year?
If you are using First Language Lessons Years 1 & 2 don’t forget the poem printables I made to go along with the memorization. I’m working on the ones for Level 3 right now and will share them soon! {Daily}
Zachary will be using ABeka Arithmetic 1. He really liked it last year, so we’ll continue it now until he is ready to move into Teaching Textbooks. {Daily}
The literature, read-alouds and independent reading choices for the year will primarily come from the Beautiful Feet book choices. Our hands-on activities and lapbooks will all be from Homeschool in the Woods and their Time Traveler’s units {they are absolutely amazing!}. We’re starting with New World Explorers and working up all the way through the early 19th Century. {Daily}
Science ~ This is one area that I am very excited about this year! We’ll be using Nancy Larson Science 1. Science 1 can cover between ages 5 to 9, so we can all use this together {hooray!}. During the year, we’ll be focusing on Life Science {bug, trees, human body and more}. The Science 1 Homeschool kit comes with everything I’ll need to use for the entire year…so I don’t have to go searching for things to do our projects and lessons! {Bi-Weekly}
Spelling ~ It shouldn’t be a surprise that we will be using All About Spelling this year. :) We’re working on Level 1 with Zachary and Level 3 with the girls. As they progress through the level, we’ll move onto the next one. We’re also going to be using All About Homophones with everyone during the year. {Bi-Weekly}
Handwriting ~ A Reason for Handwriting was new to us last year and the kids enjoyed it. The girls will be continuing with cursive with Levels C & D. Zachary will be working on printing with Level A. We will also continue to use ABeka K4 cursive for him since he has enjoyed learning cursive {grins}. {Daily}
Bible ~ All four kids will be attending Awana again this year, so we’ll be learning the verses that go along with their books and using our Awana printables and I’ll be making more to go along with the Cubbies book, Truth & Training and the new SkyStormer book.
I’m also working on some more family time devotions that will incorporate the Seeds Family Worship CDs, but have yet to sit down and get all my thought out for that. {Daily}
Writing ~ The girls will be using Complete Writer Level 4 and Zachary will be using Complete Writer Level 1. These are books that I have cut the binding off and can duplicate to use with other children since they have a copyright permission for families. {Daily}
Independent Reading ~ The girls will be reading books that are suggested in Beautiful Feet. Zachary will be working on our All About Reading books {and I can’t wait for their new program to be released this fall!!}.
Spanish ~ All three kids will work on Rosetta Stone Latin America Level 1 {Homeschool version}. The homeschool program allows up to 10 users to work on the program at their own pace, so Rick and I are planning to work along on Spanish also. Should any of the kids finish Level 1, we’ll move onto Level 2. {Bi-Weekly}
PE ~ We’ll hopefully be participating in a class at a local college again and also have classes at co-op. {2-3 times Weekly}
Art ~ Twice a month we’ll be doing an artist study and using the book Discovering Great Artists by MaryAnn Kohl to try our hand at some different art techniques. The book has art activities for kids based on famous artist along with a brief bio on each artist.
Additional Resources:
If you are unfamiliar with some of the curriculum choices/names above, you can follow the links below to learn about a few of the products that I’ve previously written reviews for. I will be sharing more about Nancy Larson Science and Homeschool in the Woods soon and will update these links as I do.
Last year we first started using workboxes and for the most part, we followed along the way it was supposed to go ~ except we used workfolders rather than workboxes. This year, after talking to the girls a bit, we revamped our system to make it work better for us. Ginger-Snap-Shots did this very thing last year with her girls with a little bit of a different twist.
This year, instead of using numbers for both the girls and Zachary, we’re switching to a more visual system. This way the kids can see what is expected of them each day. We also ditched the number strips because it was getting plain ol’ tedious for me to pull, switch, and sort the numbers everyday.
The Workbox Weekly Grid Layout
Our new workbox system will have the entire week laid out ahead of time. I have planned out what days we’ll be covering certain subjects and can lay out each child’s week in a short amount of time. Their new card system is closer to the size of an 8 1/2 x 11 sheet of paper and each day has it’s own sheet.
Here’s a peek at Laurianna’s Weekly Grid so you can get a visual of what I am describing:
If you look closely, you’ll notice that the velcro that attaches the activity card is actually on the corner of the card {I used 3/8” sized velcro coins}. The front of each of the cards has another 3/8'” velcro dot in the top right corner. When the kids are done with that subject/activity, they can simply flip the card over {see the picture below}.
Here’s a look at the entire week laid out as individual days. It is a lot of tags, BUT I don’t have to keep resticking them since they get flipped over. :) Friday is always skimpy since that’s the day that we have co-op and end up playing with friends.
The cards for each day have all been put together on a jump ring and they hang on the wall from that ring. Each child has their own special color of the Weekly Workbox Grid {because you all know that I color-code my kids}. The first page of the workbox weekly grid is actually their chore and daily ‘to do’ list ~ I’ll be sharing more about our new chore system later. :)
Using the Workfolders
We are still using the workfolders this year, and they will hold the worksheets and books that the kids are using for the entire week. Instead of having numbers on each folder this year, each page will have a subject card showing what should be in that pocket.
Here’s a little peek inside a folder to show you how we’re tying the workfolders into this system.
In the left pocket are Laurianna’s math cd-roms along with some scratch paper to do her math work. In the right hand pocket is her spelling progress chart. You can see a ‘Mom’s help’ tag on the pocket too ~ showing that she is going to need my help with this subject. Our folders have a total of 12 pockets, so the remaining pockets have subject tags for language, writing, history, science, Bible, handwriting, reading, etc…
Laurianna has been excited about this because she can actually work ahead in her school week if she would like to! If she wants to do three math lessons in one day, she can do that and then flip over those cards on the upcoming days.
Big and Bulky Items
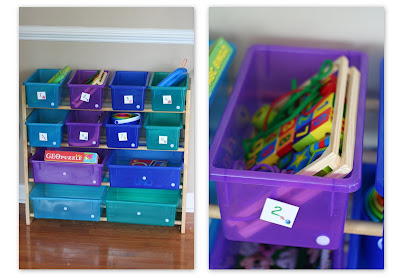
We’re still using the same system for ‘big and bulky’ items that we did last year. Each kiddo has their own special big bin on the bottom of Kaleb’s workbox station. He’ll use the top 8 bins and the bottom four are for bigger items like puzzles, leapsters, games, etc… I’ll explain more about Kaleb’s workboxes later in a preschool post.
Yes, it’s a lot of laminating on my part. And lots of tiny velcro dots. BUT in the long run, this is the system that the kids and I have talked about and will work best for us. Sometimes keeping my sanity is more important {grins}. Having the cards all in one place and not scattered over our table or everyone’s cards in a bucket helps me out immensely. Since our schedule doesn’t change much from week to week, I’m able to quickly flip cards and re-stock their workfolders in one sitting.
I’ve included some additional links for you all below to help you out if you are using workboxes or want to use a system similar to mine. :) If you have a question, please feel free to leave a comment with your email address so that I can answer you!! I’m sure I’ll be posting updates about our system to further answer questions, but this is it in a nutshell!
Workbox Resources
~ Workbox Weekly Grid ~ pdf download of the pages I put together for our kids including pink, purple, blue, green and white pages for Monday through Friday.
~ Workbox Picture Activity Cards ~ Overall, there are a total of 32 picture cards, 24 minute cards, and 4 blank cards for you.
~ Preschool Number Cards ~ Number cards with some fun characters {if you are using the traditional workbox system}
~ Velcro in BULK. I purchased the 3/8” velcro dots from Textol Systems but have also found larger coins at even better prices from Feiner Supply {and they have free shipping this month!}
Note: You might notice that some of our activity cards differ from the ones that are in my Workbox Picture Activity Cards pdf file because they are specific to our family ~ and are images that are not from Microsoft clip art. I have not included them because although we are using them for our family, they are not copyright free {First Language Lessons, Teaching Textbooks, Complete Writer, Awana, etc…}.
I know it’s practically the end of the year, so how about we consider this a suggestion for organizing schoolwork for nextyear, ok?
In reality, I lost the SD card that had these pictures on it and completely forgot that I was going to share the idea with you all until I found it the other day {ahem}.
I’ve used this system for the last few years and it has worked great for us so far. If you remember, our kids are color-coded {they each have their own ‘color’ that identifies things that belong to them}. All of our folders are stored in a wire bin and sorted so that I can quickly grab an upcoming {or completed} folder if I need to find something.
It’s a little extra work at the start of school for me, but I take a few hours, pull out all of the workbooks that we will be using for the year, rip out all of the pages and sort them for each kiddo. Truthfully, it saves me a lot of time in the long run since everything we need is divided up and ready to go for each week.
The Method to My Madness
I use six paper pocket folders per child and label the fronts of each folder ~ ones that are pretty cheap. I break the school year up into six 6-week segments {a total of 36 weeks}. The front of each folder is labeled with a name, grade, school year and the 6 week segment that it covers. For example, the front of one of the folders might read:
Weeks 31-36 Laurianna
3rd Grade {current grade}
2009-2010 {current school year}
I separate out the worksheets into six piles for the 6-week segments and then further divide them out into weekly piles. Since our writing curriculum {A Reason for Handwriting} is divided out into weekly lessons, it helps me keep track of the week that I’m sorting. Each week’s worth of lessons/worksheets is then paperclipped together {see below}.
Each week includes our handwriting, math worksheets, writing pages, etc…basically anything that was ‘pre-packaged’ and able to be ripped out of a workbook. As we move through our school year, I keep everything that goes along with that six week segment in that specific folder.
At the start of each 6 week segment, I put all of the papers on the left hand side of the folder. Each week’s worth of paperwork remains clipped together until we work on that week. If we add any paperwork during the week {spelling lesson, test, notebooking sheets, etc…} it is sorted into the pile for the week it was completed.
Completed papers are then moved to the right hand side of the folder. At the end of the week the schoolwork papers for that week are all paperclipped back together and moved to the back of the folder. When we've worked through a six week segment and the folder is full, the folders are put at the back of the wire bin and I pull out the next six week folder for each of the kids.
At the end of the year, all of our folders are put into a large rubbermaid tub that I keep with all of our school records. If I need to sort through and find schoolwork for a particular child/particular year, it’s so much easier since I already have things color-coded and sorted out for me.
Make sense? Just wanted to share a little something that is working for us in organizing our school work. Let me know if you have any questions!
Answers to some of your questions
Cindy asked: What do with worksheets that are front and back that you need for another week?
Answer: I usually put it in the week that we complete it. :) I generally write down the page numbers of worksheets that we complete in my planner also, and my planner gets stored with all of our folders at the end of the year.
Allyson asked: I think we'll probably want to reuse workbooks for a couple of children in order to save money. What would you suggest for that? Do you reuse any of your workbooks or do you purchase new ones even if you have a child that will use it the very next year?
Answer: We do reuse some of our workbooks, but there are some that I realized were just cheaper in the long run to buy and actually use ~ handwriting, etc... Several of the workbooks that I use {Complete Writer} are actually able to be photocopied too, so that's what I do in that case. If it's a worksheet that we slip into a page protector {Critical Thinking}, I just record the page number they completed in my planning book.


 In the blank area of the printable, I have a