Homeschool Creations

Thursday, February 23, 2012

How to Read Kindle Books without a Kindle Device

Many days I post any free Kindle books I’ve found on my Facebookkindle page. Frequently though, readers comment that they wish they could read the books ~ but they don’t own a Kindle.

Guess what? You do NOT need to own a Kindle to download the free Kindle books or to read them! How wonderful is that news?

Reading Apps for the Kindle

While I LOVE my Kindle e-reader that was purchased a little over a year ago, Amazon offers several other options for reading the books without owning a Kindle device. Here are a few:

~ Kindle app for your iPad, iTouch or Droid
~ Kindle for your PC or Mac
~ Kindle Cloud Reader 

Why I Love My Kindle

Aside from the convenient size of my Kindle {it fits in my purse with room to spare}, the biggest plus for me is the lack of backlighting. I have a hard time falling asleep after too much ‘screen time’ and the fact that it is much like an actual book page helps me out so much. In the summer, the text also shows up great in bright sunlight. 

Looking for a Kindle E-Reader?

If you are in the market for a Kindle there are several different options available for you to choose from, ranging in price from $79 to $189 with free s/h {I’d recommend the ones on the low end!!}. Although I have a Kindle without the special offers, I actually added them to my Kindle because they occasionally have some great deals.

~ Kindle e-reader w/ Special Offers {$79} or Kindle w/ wifi only {$109}

~ Kindle Touch w/ Special Offers {$99} or Kindle Touch w/ wifi only {$139}

~ Kindle Keyboard 3G w/ Special Offers {$139} and Kindle Keyboard w/ wifi and 3G {$189}.

~ Kindle Fire with backlighting {$199}

Note: There are other options for the Kindle as well, these are just a few of them.

Looking for Free Books for the Kindle?

On my blog No Ordinary Moments, I have a widget with the latest free Christian books for Kindle to release as freebies.
Photobucket


Although I check daily and pull books off when they are no longer free, please be sure to check the price before you add it to your cart.  New books are updated daily on my Facebook page, but you may want to visit my blog at least once a week since I will be update it several times a week!

Note: Many of the Kindle freebies are also available as free downloads from Barnes & Noble for Nook readers also. I just typically spend most of my time on Amazon {ahem}.


Jolanthe Signature affiliate button

Visit these great companies!

Labels: ,

Wednesday, October 19, 2011

Using 2 Part Cards from the Printable Packs {Reader Questions}

I was just wondering how to use some pages on your preschool packs. I think generally they are pages 3 and 4, they look like flashcards, but one page has a line separating the word from the picture.  I haven't know how to use these pages, so I've just been letting my 3 year old practice her cutting skills :) But I'd love to know what their actual intention is.

vocab collage

Each of the printable packs that I’ve put together typically has 2 different vocabulary pages that look similar to the above pages. One of the pages shows an image with the word underneath it and the other page shows a line dividing the image from the word.

Here’s a look at how we do the 2-part vocabulary cards in the packs. The first few days we review the words and their beginning letter sounds and have Kaleb point to the word as we say it. On the third day, I cut apart the 2-part cards and slide the words into our table top pocket chart {I love that we can prop it right up on the table next to us and work together}. Kaleb then picks up the pictures and slides them behind the right picture {usually based on looking at the beginning letter sound}.

20110810-IMG_1198  20110810-IMG_1199

Basically, this is just an added ‘boost’ to help children understand that there is a relationship between pictures and words and that letters make sounds.

If your child isn’t quite ready for this step, you can also play a matching game. Lay out the vocabulary cards that are not separated with a line and have your child match picture-to-picture and then see if s/he can match the words together as well.

Hope that helps!!

Jolanthe Signature affiliate button

Visit these great companies!


    Labels:

    Wednesday, October 12, 2011

    Pronouncing My Name {Reader Questions}

    How often have you looked at my name signature and asked yourself, “How in the WORLD is that pronounced??” Maybe I should have had all of you chime in with your thoughts and pronunciations first, but I thought a video pronunciation would be most helpful. :)


    Email subscribers, you’ll have to click over to see the clip!! :)

    Now the question is ~ was that how you were saying it in your head? Or have I totally messed up your thoughts now??


    Jolanthe Signature affiliate button

    Visit these great companies!


      Labels:

      Thursday, October 6, 2011

      Purchasing Velcro in Bulk {Reader Questions}

      There are several things that I use quite a bit of ~ laminating pouches and velcro. After the year that I spent what seemed close to a gazillion dollars in velcro dots at Walmart, I went looking elsewhere to find better prices.

      A heads up ~ buying velcro in large quantities is not for the faint-at-heart. I found a friend who has an obsession about the same level as my own and we split the cost and the goods between us. For the same price as purchasing about 4 boxes of velcro at Walmart, I had about 50 times the amount of velcro.

      Needless to say, I won’t need more anytime soon. :)

      Here are some great sources online to purchase velcro in bulk. Typical velcro dots at the store are about 5/8” in size. I purchased the 3/8” white velcro dots for our Weekly Grid Workbox System from Textol Systems. Textol does have the larger 5/8” velcro dots, but we purchased them much cheaper at Feiner Supply {and Feiner often has a free shipping offer on orders over $50}.

      A few things to note:

      • You need to purchase both sides of the velcro ~ the hook {scratchy side} and the loop {fuzzy/soft side}
      • Most of the velcro comes in black or white {I usually buy white}
      • The velcro comes with an adhesive back

      Hope that helps a few of you out!


      Jolanthe Signature affiliate button

      Visit these great companies!


        Labels:

        Thursday, September 29, 2011

        Using Do-a-Dot Pages {Reader Questions}

        After I get a certain number of emails with the same question, I figure it’s time to answer the question online so you all can see. Besides, maybe it’s secretly a question you’ve had, but been afraid to ask!

        Chandra emailed this week with the following question:

        There are these pages that have a letter and a picture and both are full of dots. I have never seen these before, what are the dots for? Are they to be colored in? Want to make sure I use these the best way!

        In case you’re wondering, these are the pages that she is talking about {taken from my Fall Fun Printables}. Your printer is not going crazy ~ there are white dots on the letters and pictures ~ and yes, they are meant to be there. :)

        do-a-dot

        I happen to have a son who absolutely loves his Do-A-Dot markers. Not only for these projects, mind you, but anything I’ll let him stick a dot on. If you aren’t sure what Do-A-Dot markers are, basically they are like bingo markers but colorful and fun for kids!

        image

        We have a variety of colors and use them on pages {like the above} and even for stamping out words that Kaleb recognizes on our reading sheets ~ really anything if he’s having fun and engaging in school! I put together a set of Alphabet Do-a-Dot pages {from A to Z} last year that you can download here. Each letter has two different pictures to go along with the letters.

        Alternate Ideas for Using the Do-a-Dot Pages

        If you don’t have the Do-A-Dot markers though, you may have something else around your house that you can use instead. Here are a few more ideas for you to try with the pages.

        ~ Puff ball magnets ~ Mama Jenn has a great tutorial on how to make your own puff ball magnets. The magnets are great to use on a cookie sheet. Here’s one of her children using them with a do-a-dot page:                      image

        ~ Circle Stickers ~ You know the little colorful circle stickers you can use to tag for yard sales? Those are another great fine motor activity to use with the do-a-dot pages.

        ~ Power Magnets ~ Put your pages on a cookie sheet and have fun sticking the magnets on the spots. Kids love magnets too {the power magnets are the ones we have}. With little ones you have to be careful of what might go in the mouth, but they are a hit at our house.

        ~ Transparent Counters ~ We have what seems like a gazillion of these little plastic coins and have used these as well on the sheets.

        ~ Markers ~ We’ll many times use markers to color in the dots {or crayons or colored pencils}. Depending on how detailed I want Kaleb to be, I sometimes give him the fine-tipped markers so he has to work a little harder at coloring in the lines.

        What other ideas do you have to share to use on the do-a-dot pages?  Leave a comment and share how you’ve used the pages with your kids!


        Jolanthe Signature affiliate button

        Visit our sponsors!

        Labels: ,

        Wednesday, July 27, 2011

        Do I Use All of the Preschool Packs {Reader Questions}

        I’ve had several people ask me if I use all of the pieces that I include in the various Preschool Packs that I put together.

        The short answer ~ no.

        The long answer ~ not because we don’t always want too. There are many times that I put something together, am absolutely excited about what I’ve created and it falls on unimpressed eyes. :) There are other times that I include something in a pack because I know that others really enjoy it.

        At times I alternate on what I print out for Kaleb to do and there are times that he literally begs me to do something time and time again ~ so I just go with the flow.

        All that to say ~ the wonderful thing about Preschool Packs is that you can print off whatever your heart {or your little one’s heart} desires to do and work on! If it isn’t a great fit for your child or if you just want to change things around and rotate the things that you present to your child, you can!

        Now I have a question for you!!! I’m curious ~ what has been your favorite part of the different Preschool Packs?

        Jolanthe Signature affiliate button

        Labels:

        Wednesday, July 20, 2011

        Font Choices {Reader Questions}

        Last week I received the following email from a reader and thought it would be a great question to address on my blog ~ just in case one of YOU had the same question.

        I was looking through the Transportation pack and was wondering if you could consider picking a different font on the materials that the children actually use? Specifically I’m talking about the letter “a” ... I would prefer the “a” version as that’s how they are taught to write it.

        Specifically, here are the two different letter ‘a’ styles that are being referenced:

        a or a

        Here are my thoughts…

        I realize that I use different fonts in my packs ~ sometimes because I really like a particular font, but also because I think that it is important to expose our children to different letter/font styles. We live in a media rich society and everywhere we look {tv, books, computer, billboards, etc...}, different font styles are represented. While I teach our children to write using the standard 'teacher' font style, there are numerous styles of letters and numbers represented in the books that we read every day to our children. My goal is to let my child SEE those differences, know that they represent the same letter, and let them be familiar with them.

        For example, I took a picture of four books that I picked off the top of our book basket {Curious George, Tumble Bumble, In the Castle and one more...}. If you look at the letter/font styles, two of the letter a's are shown in the style that most children learn to write their letters in and two are in the other 'a' style.

        20110712-IMG_0911

        The bulk of the Preschool Packs that I've put together were primarily created for me to use with my children during our school time. Because we’ve enjoyed them, I’ve then shared them with you. While there have been times that I’ve added an activity or switched something around, typically I try to do things the way we enjoy using them so there isn’t a lot of extra work involved on my end of things.

        Hopefully that answers your questions! :)

        Jolanthe Signature affiliate button

        Labels:

        Tuesday, December 14, 2010

        Teaching With Little Ones in Tow {Reader Questions}

        Several of you have asked how we get all of our homeschooling done with younger ones around. Granted, Kaleb is our youngest now {he just turned 4}, but even he has been challenging lately during our school time. We’re working out some kinks in our current schedule, but even the best laid plans can run amuck.

        Over the last few years our schedule as changed and rotated, generally in response to how we can accomplish the most when the younger ones are involved…or not involved {grins}. I absolutely do NOT have the answer to question, but can say that I am most happy that homeschooling allows us flexibility in our schedule and we can change what isn’t working and stick with what is.

        The key to my sanity, however, has been having a general routine/schedule in place ~ but flexible enough that I don’t go crazy. There are times that I overplan activities {ahem}, but having that plan in place and things to do, especially for the younger ones, can help things go much more smoothly. There are days that go according to plan and days that go completely haywire, but having a general direction for our day helps immensely.

        When Kaleb and Zachary were both younger, much of our school time was accomplished during nap times. If the longest nap time period was in the afternoon, than we did a few fun and smaller school things in the morning {calendar, reading, etc…} when they were awake, but anything that required more 1:1 attention we did during nap time.

        As Zachary grew out of his nap time, we moved more toward doing morning school time and I focused on learning activities with him first thing in the morning while the older two could work on more independent activities. Kaleb was slowly worked into this routine and as soon as they were finished with their ‘work’, they were free to play outside together or in their room with special toys, or even a video sometimes. :)

        Currently, we do several things together first thing in the morning during breakfast {calendar time and devotions}. After chores and cleaning up, the kids have a bit of free time while I spend 1:1 time with Kaleb and focus on him. Then the older kids start their independent work. As soon as Zachary finishes his independent work {usually around the time I’m finished with Kaleb}, I work 1:1 with Zachary.  When we’re done, he and Kaleb have play time and I focus on the girls for a bit, until we all get back together to work on a few subjects together.

        Does it all go perfect and according to plan? Ummmm…nope. Kaleb often wants to be smack dab in the middle of whatever it is that we are doing. I try to keep fun and ‘quiet’ things for him to do while we are sitting down ~ so the other kids aren’t distracted. Some of these things include:

        • Do a Dot markers
        • cutting activities
        • coloring/coloring books
        • stickers
        • playdough
        • sensory bins
        • blocks/legos/duplos
        • puzzles, etc.

        I’ve uploaded a copy of our current daily schedule so you can see how I’ve laid out our day. Click on the image to open the pdf schedule.

        image

        Do YOU have any tips/tricks that have helped you school with little ones around? Leave a comment and share! Susan Lemons also has an article called Keeping Little Ones Busy that might help you out also.

        Jolanthe Signature affiliate button

        Labels: ,

        Wednesday, December 8, 2010

        How I Create My Printables

        I’ve had a LOT of questions lately about creating printables and figured it would be easiest to do a ‘blanket’ post that addresses several of the questions that are being asked ~ and who knows, maybe you had some of the same questions!

        What program do you use to create your printables?

        I work primarily with Microsoft Office 2010 Professional products and my favorite overall is Microsoft Publisher. Before you go into sticker shock over the price of Office 2010 Professional, I’ll let you in on a little secret…if you are homeschooling, you can purchase the teacher/student edition of the software for a LOT cheaper! You do have to jump through a few hoops, but I think that I paid under $200 for the set.

        Microsoft Publisher is by far one of my favorite programs to work with ~ much easier to use than Microsoft Word. I can move things around a lot easier and they generally have some good clip art too.

        Another program that I use a lot is Adobe Photoshop Elements ~ not as much as Publisher, but sometimes there are few things that I like to do in that program to edit files.

        Where do you get your clip art?

        Microsoft has a good store of clip art available in the program, so it is the first place I look, since it is free for me to use and also ok to use for copyright. I am VERY careful about the clip art that I use ~ I don’t pick random images off internet searches and do my best to make sure that an image is copyright free before using it.

        One site that I’ve found recently and used a lot is Fotolia.com. They have some great clip art {like what I used in my Pirate Preschool Pack} and it only runs me a few dollars for the clip art that I purchase. In the Gingerbread Baby Preschool Pack, I used clip art that I purchased from Stockberry Studios. In the past, I’ve also had a subscription to Clipart.com, but that can get a little pricey too. I will admit that I’m a sucker for good graphics though!

        Once I have the clip art, I use my programs like Adobe Photoshop Elements or Microsoft Publisher to manipulate the images by changing colors, creating shadow images, etc… Truthfully, that part can take the longest for me, because I like to get things ‘just so’.

        Where do you get your fonts?

        Generally, anyplace that’s free! There are a few fonts that I have that I did purchase in a set from Downhill Publishing ~ Fonts 4 Teachers. That is the more ‘teacher/print’ font that you see on a lot of my printables lately.

        Other than that set, the rest of the fun fonts I find are all free online. I find them just doing general browsing on sites like 1001 Free Fonts.

        What is that font you use to make your calendar printables?

        The name of the font is Love Ya Like a Sister {and I love it!}.

        Can you tell me how to make a printable?

        As much as I’d love too, I’m really not sure how I can show you unless I were with you in person. Much would depend on what programs you are working with on your computer and it isn’t something I can really show you a step-by-step process on how to do. I’m sorry!

        What type of a printer do you use?

        I am frequently asked this question for ink usage, etc. We have an HP OfficeJet 7500 series similar to this one on Amazon. We pick up ink refills at Costco when they are on special once or twice a year. When we print things off, I generally print in fast draft to help save ink {and money}.

        I also try to laminate printables that I know we can re-use. I am very much in love with my laminator. :)

        Hopefully that will help answer a few questions for you all!

        Jolanthe Signature affiliate button

        Labels:

        Monday, August 16, 2010

        You Asked! 4: Software and Clip Art

        I’ve been getting a lot of questions lately about what I use to create my documents and printables and graphics….and where I get my clip art.

        For most of the printables that I create, I use Microsoft Publisher and then convert the files to pdfs so that you all can download them. Publisher has been a program that I’ve had for years and is part of the Microsoft Office Professional software pack. Many of the pieces of clip art that I use are from the Microsoft clip art collection {you can also access the images online}. Two other sites that I like to browse and use are clipart.com and fotolia.com. Both of those sites require either a membership or that you purchase download credits.

        When I make headers, buttons, etc… for blog designs and such, I use Photoshop Elements 8. I actually picked up our software at Costco when they had a coupon for it and have LOVED it! It doesn’t have all the bells and whistles that the full Photoshop has, but it also has a better price tag for me…especially since I’m just fiddling around. :) I’m still learning about much in the program, but it allows me much more freedom in creating graphics.

        Hopefully that answers a few questions for you all! If you have other questions, leave a comment and let me know and I can hopefully answer it in a future post…or point you in the right direction.

        Jolanthe Signature affiliate button

        Labels:

        Tuesday, September 22, 2009

        You Asked!: Scribd, Creating Thumbnails, & Clip Art

        Quite a few of you have emailed me or commented asking different questions and since they are piling up in my 'blog questions' folder, it's time to answer a few of the questions!

        Q: If you don't mind my asking, I was wondering where you get your photographic clipart for your printables (the consonant cards, color cards, etc.) I have a subscription to clipart.com, but was wondering if there was another source for good clipart?

        A: Microsoft, baby.

        For most of the documents that I create, I use Microsoft Publisher and then convert it into a pdf file {don't worry, I'll explain that in a bit}. I am ever-so-cautious about the graphics I use because of copyright issues. The clip art that is included in the printables will come from copyright free sources {or ones that give permission to use them}.

        I do numerous searches in Microsoft {both the program and online} to find the right 'photo' or piece of clip art. Sometimes I will edit the graphic {crop, etc...} to make it work, but otherwise, it all comes from Microsoft. The only exception I can think of right off hand were the preschool number cards that used graphics from the public domain site Disney Clip Art.

        Personally, I am a little skeptical about doing Google searches, because I just don't know where the graphics originated. While I might make something for my own personal use, I am careful with what I share so that I don't infringe on other's copyrights.

        To convert my documents into pdf's I use a program called CutePDF Writer - it's free and ever-so-handy!

        Q: How do you make the tilted thumbnails of your scribd documents?

        A: I use two different things to create my thumbnails ~ screenshots and Picasa. I usually pick a page or two from the document that 'jump' out at me the most and use the 'print screen' feature on my keyboard to capture a jpeg image of each document page. If your computer has that feature it's usually located up in the top right of your keyboard. :)

        Once I have the jpeg image saved, I use the program Picasa {a free download from Google} to do quick edits and create those thumbnail images that have text on them. Picasa makes it super-easy to add a border around a picture, add text to an image, create collages and even touch up colors and lighting on pictures.

        Another great feature of Picasa is that you can rotate, tilt and mix images together when you create your collages. So when you see two of the pages in my thumbnail, I've just created a different collage. I LOVE it!!

        When I'm done editing and cropping the picture I upload it, copy/paste the code and then link it to Picasa {and I'm aware that some of you are just hearing 'blah, blah, blah, blah...' ~ but I promise it's a great program!!}.

        Q: I just signed up with Scribd (cause I saw that was how you do it) and it uploaded fine. I just can't figure out how to get that uploaded to my blog.

        A: Hopefully this screenshot will help you out some. Toward the top of the page {the top red arrow on this graphic points to it} you will see a tab that says 'Share & Embed'. Click on that tab.


        Underneath the blue bar where it says 'Embed' you will copy that code and enter it into your blog post while you are in the 'edit html' part of writing your blog post.

        Hope that helps some of you all out some! Let me know if you have any other questions!

        Photobucket

        Labels:

        Thursday, August 20, 2009

        You Asked! ::2::

        I answered a few of your questions a few weeks ago and after that had another round of questions that were asked about various things. If your email address is linked to your comment, I do try to reply to you ~ but sometimes the questions are asked by several people so I'll occasionally answer questions in post form too so everyone can see the answers.

        Today's questions are focusing on blogging tips ~ just a few though. Quite a few of you asked about making your own blog buttons and I'll have to go through that step-by-step another time {or point you in the direction of another great post about it!}.

        Q: How do you change your blog layout or template without messing everything up? I hate using the standard blogger template but I am afraid to mess something up and lose all my work!

        A: I have a 'test blog' - it's hidden so nobody can see the mess that it is. My test blog was created so I could freely play around with the html or template and not worry about wreaking blog havoc. On my test blog, I try out new buttons, headers, or layouts BEFORE I actually make the switch on either of my blogs ~ and it has saved me from a lot of trouble. :) Since you can create free blogs with Blogger - it wasn't a big deal to create it. Once I know it is safe, I can easily cut/paste the html and update my actual blog without worry.

        And always be sure to back up your template before making any changes. Always. I have a Word document saved in my files with the current html for both of my blogs. Just in case. And we won't even talk about the fact that I messed up my blog because I didn't follow my own instructions once. Nope, we won't.

        Q: How do I add those "you might like..." boxes?

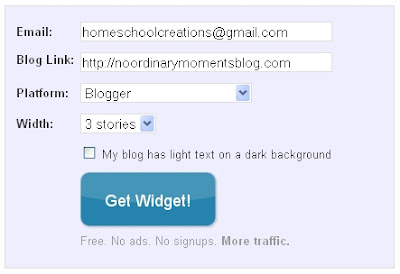
        A: This is so very easy. Visit the Link Within website and they will literally walk you through the process. You enter your email, blog address, and what blogging platform you use and click "get widget".


        You can either use the code they provide and add your own widget following their directions, or you can let them do it for you. It's that easy!

        Q: How did you get your blog to three columns?

        A: Really, the answer isn't something you are going to like. How I did it ~ and how I'll recommend you do it are two completely different things. I have a bad habit of fiddling with my html. Very bad. Especially since I just play and learn and to stop and tell you what I did or how I did it....I'm not always entirely sure.

        Here are a few places I would recommend that you check for free templates of 3 column blog templates:
        There are a few places to get you going - but you will have to install the code yourself. :) Have fun looking!

        Photobucket

        Labels: ,

        Thursday, July 23, 2009

        You Asked! ::1::

        I try really hard to answer any questions that you all have when you either email me or leave a comment. I'll mention again that it's SO much easier for me to respond if your email address is 'shown' only to me. It's quick and simple in blogger to enable it {I promise!!}.

        I've been saving some of the questions you all have had because it would be helpful to reply via a post so others {who might have the same question} can see the answer too. I'm going to try to answer a few of them every now and then for you all.

        Today I'm focusing on the ones that related to printables I've made and Scribd.

        Q: I was able to download all of the printables except one. It still takes me to Scribd, but instead of having a choice to "download", like all of the others, this one does not - only allows me to print. I was wondering if you knew what the problem might be? Or perhaps you could send me a .pdf of the document??

        A: Occasionally I have issues with Scribd and the 'download' option does not appear. Please let me know if this happens! I believe that I have fixed all the problems so far, but I really do want to know if you have problems with something I've posted. Several readers aren't able to download things because of where they live, and I will happily send you the pdf via email if needed!

        Q: Do you have any new cards coming? (LOL) - they are just SO great, I can't wait to see what you come up with next!!

        A: Should I get my bum in gear, I have two different sets of cards coming up along with some workbox tags. For preschoolers I am working on words with four letters {similar to my 3 letter ones} and for geography I have some flag cards coming soon! Of course, I'm always open to suggestions!

        Q: How do you upload and publish documents to Scribd so they are multi-page documents. I use Microsoft Publisher to make my documents. HELP!!??!!

        A: I use Microsoft Publisher also to create my documents but convert them to pdf files before uploading them to Scribd. I found a great FREE pdf converter called Cute Pdf Writer and love it! It is super-quick and simple to convert any file - you choose the 'pdf writer' as your 'printer' and it saves it as a pdf within seconds! I am then able to upload the entire document to Scribd as multi-page documents instead of page by page.

        Q: How do you get a picture {thumbnail} of your document in your sidebar? Do you do it through Scribd?

        A: Scribd is bypassed on this one! I actually use the 'print screen' feature on my computer and make a small graphic of the page that I want to feature. I add text using Picasa and then upload the edited graphic to Photobucket. I can use the html from there to create a button that links to the document itself.

        Hope that helps you all out! Keep the questions coming - I'll do my best to answer!

        Photobucket

        Labels: