This craft was super simple and quick to do, but a great ‘hands-on’ craft for our preschooler to remember the parts of a flower. Our focus was learning about four parts: flower, leaves, stem and roots and the supplies we used are just as simple.
You’ll need:
tissue paper {your color choice!}
4 or 5 pieces of brown yarn cut into 6” lengths
green pipe cleaner
green construction paper
tape
Putting it together:
1. We used the pipe cleaner as our stem and then tied the yarn to the base of our stem {some of the pieces we tied onto other pieces of yarn so our roots would ‘spread’ out a bit.
2. We folded the tissue paper up accordian style and then wrapped the other end of the pipe cleaner around it in the center and fanned out the tissue paper so it looked more like a flower.
3. I cut some leaves out of the construction paper and taped them to our stem.
Simple, short and sweet ~ but a great ‘hands-on’ craft for learning about flowers!
Kaleb still hasn’t grasped the game of tic tac toe, but that doesn’t mean he doesn’t enjoy trying to play it. Rather than using paper to play games, I put together a Tic Tac Toe board using something super simple: hot glue and 4 popsicle sticks.
Right now we’re using acorns as our playing pieces and we can change out the pieces as the seasons change.
Just wanted to share something quick and easy with you!! Quick…assuming it doesn’t take you 10 minutes to find your hot glue gun {like it did me}.
I can tell you all honestly that things aren’t always all bells and whistles here. :) There are weeks when I feel like I pull out all the stops…and then others when we’re doing a little bit of this and a little bit of that.
Not to mention the weather was GORGEOUS this week, so we took a nature walk and got LOTS of exercise!
Zachary was chomping at the bit to go outside every day, so he was literally throwing work on the table and begging to do things ~ as in three math pages a day {thinking he was getting off easily…}. Because he was so eager…he failed to realize that he was doing some rather lovely subtraction problems ~ and he was doing them well.
Reading well…and learning more verses to finish up his Awana book {he was so proud}.
Little Mr. Kaleb had much fun doing some practical learning this week ~ sorting clothes with Mommy. Short sleeves vs. long sleeves. Shorts vs. pants. Jackets vs. sweatshirts. Girls vs. boys. Lots and lots of sorting. Helping Mommy wash clothes {lights and darks} and organize. The boy loves to help organize! :)
Despite the fact that we’re technically near the end of the year, we’ve switched around our routine a little bit so that the boys are doing all of their ‘stuff’ with me at the beginning of our day ~ after our calendar time. When we’re done, they have a set activity to play together and then have free time while I work with the girls. All in all, it’s working out much better for us all and it’s been one of those ‘duh’ weeks for me {as in, why didn’t we do this sooner?}.
Before I forget, here are a few more alphabet crafts. Click on the picture to go to the ABC post.
How did your week go? :) Did you conquer a MOUNTAIN of activities or go from day-to-day and have fun together? Leave a comment and let me know!
Don’t forget that we’ll have a bunch of great giveaways linked up here starting Sunday. I have a couple preschool-related giveaways planned, so stay tuned!
Ready to Link Up?
Share what you are doing with your kids! Please link your exact blog post to the Mr. Linky below and link back here too! The updated guidelines can be found here if you need them.
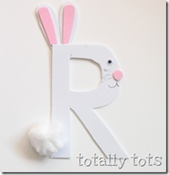
At the beginning of the year I was posting the alphabet crafts that we were making during our preschool time ~ up until the letter F.
I didn’t quit, but have been sharing them over at Totally Tots as part of the weekly Now I Know My ABC’s time. If you are interested in seeing them and making them along with your kiddos, you can click on the thumbnail images below and you will be taken directly to the post showing how to make the craft.
All of our kids had a great time working on this craft ~ especially Kaleb. Actually, Kaleb had way too much fun. By fun, I mean that Kaleb was painting his face with the white-out brush, painting the table, took a lick of white-out, and then dropped it on the floor. Now I’m trying to figure out how to get white-out off my wood floor.
BUT the end result was much better than the actual process, so maybe MY misfortune can help you all find a better process. :)
The project is actually two layers ~ a transparency sheet lays over top of a picture that your child has colored. Then you add ‘snow’ to the picture by painting on the transparency layer.
What You’ll Need:
a jar of white-out
white paper
clear tape
colored pencils
transparency sheets
scissors or paper cutter
How to Make Your Snow Scene:
Our pictures were a half sheet of paper {5 1/2” x 8 1/2”}.
Cut your sheet of paper and overhead transparency sheet in half so that they are the above size. You can use a full sheet if you want to also.
Tape the transparency sheet to the top of the paper on one of the sides, so that you can open it like a book.
Have your child color a scene/picture on the paper using colored pencils or crayons.
Flip the transparency over top of the picture and let your child add snow to the picture scene.
Here is how Zachary’s picture looked with and without his snow.
Little by little we're getting back into the swing of school time. Some days are a little crazier than others, but that's to be expected when coming back from a nice long vacation. :)
Next week promises to be fun and crazy too, but we're going to fit in what we can! I will be out of town at the end of next week, so I'm not sure about my internet connection, but should have things ready on this end...but we all know how plans can go awry!
We didn't really have a set focus this week, other than lots of books about snow and cold weather, but otherwise we just had fun doing a little bit here and a little bit there.
Art
H is for House
Our letter craft this week was the letter H for House {full directions are on Totally Tots}. We read The Napping House by Audrey Wood to go along with the craft.
We had a lovely HUGE box that the kids called dibs on this week and have had WAY too much fun playing bus stop, elevator, boat...really anything that they can think of .
Math
Pennies and Nickels ~ This week we've been working on money values. We're only focusing on pennies and nickels right now. Remembering that pennies are worth one cent is going well, so we're learning how to count by fives and remember how much the nickel is worth.
One of the ways that we are incorporating more money counting into our day is during calendar time. Carisa at 1+1+1=1 had a great idea to use coins to count the date out ~ you can see more on that here.
We aren't using the printable coins. Instead I bought some play money and put velcro dots onto the back of the coins. Depending on the date, we use the money to make the date {i.e. January 8th is a nickel and 3 pennies}. Zachary is loving the hands on aspect of using the money too. :)
Telling Time ~ Zachary is able to tell time using a digital clock and also to the hour on our many other non-digital clocks. A book that he loves is Telling Time with Tickety Tock {a Blue's Clues book}.
Reading and Spelling
I really can't say enough about All About Spelling and how much we love the program! Zachary asks me if we can do it every day {we usually do it once, maybe twice a week}. some days we do half of a lesson, depending on his attention span.
Sometimes we use the letter tiles and other time use the whiteboard to practice handwriting. Since we've been working on lowercase letters, the whiteboard was handy this week.
We have several different books/programs that Zachary is using for his reading time. One of them is the Beehive Reader that goes along with All About Spelling and their level one program. We just read a few pages every day together, but this week have been working on the 'th', 'sh' and 'ch' sounds. He is obviously getting it too! McKenna was fussing about how to spell the word 'inch' and Zachary sounded it out and spelled it for us. :)
Stories & Books We Used
Ready to Link Up?
Share what you are doing with your kids! Please link your exact blog post to the Mr. Linky below and link back here too! The updated guidelines can be found here if you need them.
These little pumpkins were so super-easy to make and all of our kids wanted to make one, so we had them hanging all over our house for the last few weeks! Here's what you'll need:
Orange construction paper cut into 1" strips
1" strip of brown construction paper
2 leaves cut out of green construction paper
2 brads
hole punch
1. Stack the orange strips of paper together. Use the hole punch to put holes in the end of the strips. Depending on how many strips you are trying to punch through, you many need to do it a few pieces at a time.
2. Take one brad, poke it through the hole, and fasten the strips together.
3. Fold the brown strip in half {for the stem} and use the hole punch to punch through the stem, leaves, and the strips on the opposite end. Push another brad through and fasten.
4. Spread or 'fluff' out the paper strips until it forms a round pumpkin shape. Hang and enjoy!
The saddest part of my week {ok, I exaggerate a little bit...} was discovering that our craft stores carry every shade of foam sheets and construction paper ~ except GRAY!! Do these people not know that elephants are just begging to be made by local preschoolers?
I got the idea from this post at No Time for Flash Cards. The kids have been loving the crafts {and the parents too, I believe!}.
What You'll Need:
Gray or white foam sheet/construction paper {our craft stores only had white}
Scissors
Pen {to trace letter}
Paint ~ if you can't find gray paper or foam
Googly eyes
Glue
How to make the 'E' Elephant:
Trace and cut an uppercase 'E' out of the foam sheet or construction paper. I used a foam sheet that was about 4" x 5" in size. Since our craft store didn't have gray foam, I used white and we painted it gray after we had glued it all together.
Using the extra foam, cut out an ear and a trunk for the elephant. I used a little sliver of our white foam to also cut out a tusk for him.
Glue the elephant's trunk onto the middle section of the letter 'E'.
This dinosaur was great for identifying several different shapes with the kids ~ triangles, rectangles, and ovals. When we sat down to put the craft together, the kids had to count out four rectangles, five triangles, and one oval so we were able to squeeze in a little math too! Depending on the colors of scales the kids pick out, you can also pattern the scales.
What You'll Need:
Green foam sheet or construction paper {I used two different colors}
Scissors
Pen {to trace letter}
Googly eyes
Glue
How to make the 'D' Dinosaur:
Trace and cut an uppercase 'D' out of the foam sheet or construction paper. I used a foam sheet that was about 4" x 5" in size.
Using the extra foam, cut out several triangles for the dinosaurs back.
Cut out four rectangles to use as 'legs', an oval for his head, a neck and a tail.
Glue the legs, tail and neck onto the back of the letter 'D'.
Flip the dinosaur over and add his head, scales and eye.


 I can tell you all honestly that things aren’t always all bells and whistles here. :) There are weeks when I feel like I pull out all the stops…and then others when we’re doing a little bit of this and a little bit of that.